Wednesday, May 25, 2016

Spray Paint for the Ugly Range Hood

So as we do the kitchen, there are so many things to address. Listen, I don't want to finish the kitchen and put weeks (months, really) into it and still be unsatisfied when we are finished. That being said, sometimes I have to get a little more creative because of limitations. One of those limitations is the range hood.

We have a typical cream colored range hood like most builder grade homes:


It's not really pretty, so I really wanted to do something to it to make it a little more desirable. My dream would be one like this:


I mean. Right? I love the copper, the scalloping, and basically everything else around it. But that's not the point right now. The problem is that I have a small kitchen as it is, so I can't afford to lose the cabinet space above the range. Also, I am not made of money. I am a stay at home mommy of two kids, so this type of hood is out of reach for me right now. But hey, that's what my imaginary dream house is for, right? Should I ever get the chance to build it, this baby will be making an appearance.

So for now I needed something to update the functioning hood I have now, so Rustoleum to the rescue.


I really love the color of this paint. It's coppery without being too orange or red. 
(I have no affiliation with Rustoleum or Amazon, just like this product).

So to start off, I sprayed the hood twice with Krud Kutter (again, no affiliation) and made sure all grease was gone. This paint has a primer built in, so I didn't bother priming or sanding since it says it will adhere to metal. Then I covered anything I didn't want to get paint on, and taped off the under side because I didn't want to paint that part.


I also opened all windows, actually turned the hood fan on to minimize the paint fumes, and I had Phil take the kids out of the house for a little while so there was no paint fume exposure for those guys. I probably should have put a sheet on the floor too because the paint does let off a kind of dust... that may or may not have been tracked throughout the kitchen and onto the rug..... Oops. I also had to wipe down and wash most things that were left on the counter across the kitchen. Spray paint is way messier than I realized when it's sprayed inside your house. Yikes.


So.

I sprayed a few light, even coats, leaving a little time between each coat. I also made sure to spray the switches in their on positions, waited an hour, then turned them off to spray them again so they would be fully covered and no white would show in the on or off positions. I hope that makes sense.


Here is the finished product:


'


I think it's really helping the farmhouse vibe in here. Of course, the cabinets will be painted white (and are well on their way) so I think the hood will look even better when that is all done.

 I finished this up over a month ago, and I still love it every time I walk in and all it cost was the can of spray paint... And a couple hours of clean up from underestimating how messy spray paint is in the house. Seriously. Cover. Everything.

Have a great day, friends!


Tuesday, May 17, 2016

The Decorating Process

So, okay. I get asked by a lot of people for help decorating (which I love doing) but I don't think it's that difficult once you break it down. I honestly think the hardest part is getting started. From there, it's basically as tricky as copying. Yep. I am a big fat copier. So is every other decorator out there. There is nothing new under the sun, so let's just get that out of the way now.

There is no need to feel bad about not being original. Most people cannot just come up with inspiration out of the recesses of their brains. You know the expression that the best writers are great readers? Same idea. We get inspired by others, who were inspired by others. I used to feel like I wasn't good at what I love because I wasn't coming up with my own ideas. Silliness. There is no room for feeling inferior here. Decorating should be fun!

Okay, now that we got that out of the way, let's break down this process.


I am going to use my kitchen as an example since that's what I am currently working on.


First, gather inspiration. You can browse Pinterest, magazines, books, blogs, or even Google images. I use all of those mediums for inspiration, but my favorite is still Pinterest. So for my kitchen, I just typed "kitchen" into a Pinterest search. Any image that made me stop to look at it, I would Pin it to a kitchen board.


Once I pinned several images, I began to see a pattern; I really love white kitchens the most. Every image I pinned had white cabinets. So I searched white kitchens. With each step, I would discover more of my taste and narrow even further to discover exactly what I want in our house. Through this process, I discovered I really loved the farmhouse style, so I searched that:


That search brought up some of my favorite kitchens ever. Like, as in, I clutched my hands to my heart and sighed and I am pretty sure I turned into that emoji with the heart eyes. You know, the images I couldn't get out of my mind and just kept thinking, "If I had THAT kitchen...... *sigh*". I think you guys know what I'm talking about.


All 3 above are Skies of Parchment


All of these kitchens are pretty similar. I picked out the common elements I *loved* and I am incorporating them into my own kitchen.

-White cabinets
-Beadboard backsplash
-Warm wood tones
-Open/glass cabinet doors
-Farmhouse style sink (more on this in a second)
-Bridge faucet
-Dark hardware
-Chandelier style light


After putting my wishlist together, I had to figure out what I could afford to do and what would be practical in my kitchen. I really really wanted a farmhouse style sink, but it wasn't practical for my budget or for the laminate counter tops I currently have. The counters are in good shape and honestly, they aren't my dream counters, but they far from bug me, so they stay. SO, the dream sink and butcher block (wood) counter tops are out, BUT I can make up for it! Instead, we found a HUGE beautiful white cast iron sink and I got my beautiful dream chrome bridge faucet and I LOVE it. Like, a lot. So I am totally cool with the compromise.

I instagrammed this last week as I was priming the cabinets. 
***All the heart eyes***
:)

The biggest change is still an ongoing process. That is the painting of the cabinets. I researched the best paint, process, and products for painting the cabinets, but the biggest obstacle was choosing a color. There are so. many. whites. So many. Like, a crazy amount. Once again, Pinterest to the rescue. I will share that process another day though if you like because picking the right color for any room or project... that is a WHOLE other story. 


So the process of decorating is really just a process of discovering taste, looking at beautiful images, setting a focus, then copy it with a few adjustments here and there. It's really not that scary or complicated to tackle a room makeover once you have a vision and some inspiration! I hope that maybe knowing a little more about my process will help you guys if you have been feeling stuck or frozen on a certain area of your home. Getting started is the trickiest part! Happy decorating, guys! :) 

Wednesday, May 11, 2016

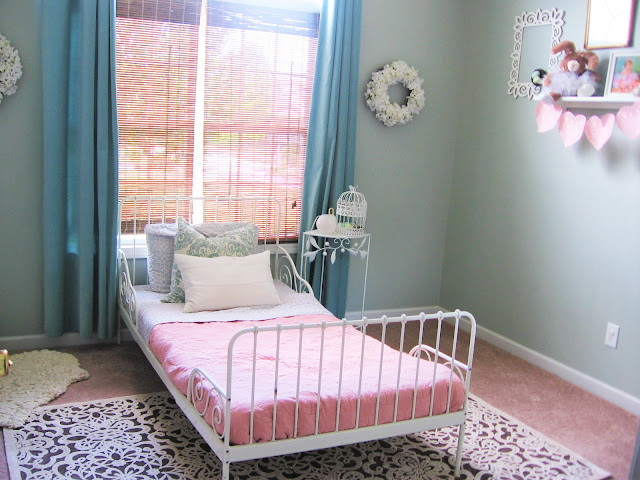
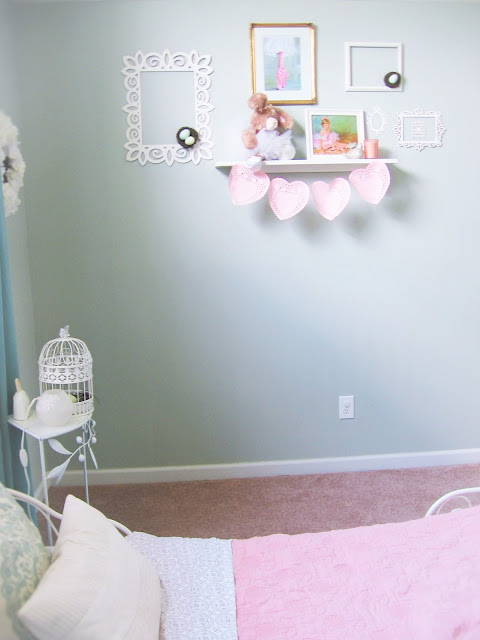
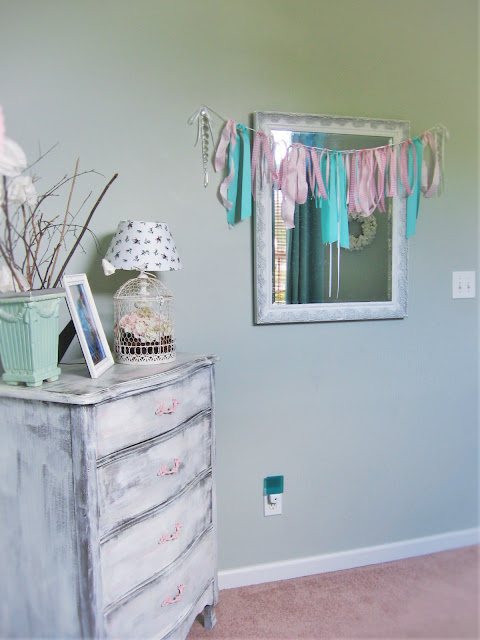
Lydia's Room

Hey all! I am taking a break from painting (and painting and painting...) the kitchen cabinets to show you guys the progress in Lydia's room.

As with all rooms of the house, it is a work in progress. Her nursery in our apartment was the one room I considered "done", but after we moved into our house it kinda sat bland, boring, and messy until I found some inspiration. As I mentioned before, the theme of this house is s-l-o-o-o-w when it comes to decisions and projects. I don't like rushing myself to get something done before I have an exact idea of what I want and how I want to do it. Otherwise I get "buyer's remorse" or, in this case, "decorator's remorse". I have had that one too many times, friends, so I have learned my lesson the hard way.

As I said, I was a little stuck until I came across this image on Pinterest:


I used The Sherwin Williams Chip It! tool to get an idea of paint colors, and finally had the inspiration to get started!


This is where we started the day we saw this house:


And honestly, it wasn't much different from that for over a year.


This is the same view today:


We chose to use Comfort Gray for the walls, and it is truly as lovely as everybody says. It's gray, green, and blue depending on the light and time of day, and I kind of love that.


I still have a lot of plans for the room, but I will just show you the pictures of the progress we've made.


Right now I am distracted with the kitchen, but there are a few more projects to do to finish up Lydia's room... you know, until I get the urge to change it again ;) 


..... back to painting I go!


Friday, May 6, 2016

Kitchen Plans!

...

......


You guys. Kitchen plans. I mean. Kitchen. Plans.


Ahhhh!!! I am so excited! This means that the kitchen refresh is in the very very near future. I have been thinking and planning and scheming where this kitchen is concerned since the day we put an offer in on this house.

It takes me a long time to research and plan a room like this. Really, I don't think I would have been ready to do the kitchen before now, and this summer marks 3 years since we moved in! With an investment like this, I like to be 550% certain before I make a move. I have been browsing pinterest, magazines, books, and anything else decor related trying to come up with the perfect plans for our kitchen. You guys, most of this stuff I am about to show you has been purchased and either installed or in my house just waiting. That basically means I am the most excited person ever because the kitchen project is REAL. It is legit happening. Basically I just need assistance where the power tools portion of the kitchen is concerned. Other than that, we are under way!

So anyway, here is the plan:


We have sort of a farmhouse/cottage/french country thing going here.


We are keeping the existing cabinets and counter tops, but we are painting the cabinets white and installing crown and trim to make them look a little more custom on the upper cabinets. The lowers will be getting feet (I adore feet on cabinets).

We are installing a back splash in the form of beadboard and adding corbels. New light fixtures, sink and bridge faucet have already been installed! The painting of the cabinets will hopefully begin next week. Here is a peek at what we are working with:


Not terrible, but not exactly what I'm going for if you know what I mean. Also, that refrigerator is a bad diy experiment gone wrong. Yikes. So that will be addressed somehow, I am just not exactly sure what that solution might be yet....

Here we go! Kitchen refresh, here we come!!!


By the way, all kitchen sources will be shared once it's all completed, if anybody is interested.


Have a great weekend and Happy Mother's Day to all the moms, but especially my mom who has sponsored this blog post in the form of keeping Lydia last night, allowing me the time to write this. Love you mom!! Thank you for everything you do!